Every shed home we supply starts as a standard design, and every one of them gets customised before it’s built. Your block is different, your family is different, and the way you want to live is different. Customising your floor plan is how a kit home becomes your home.
What must you consider before you customise a shed home floor plan?
Zoning and planning permission are the first constraints that shape every floor plan decision you make. Planning permission and zoning determine whether a custom shed floor plan can be built as a dwelling at all, with restrictions on footprint, height, and setbacks that vary by council. Contact your local planning department in writing and obtain confirmed limits before you sketch a single room. A verbal assurance from a council officer carries no legal weight when an inspector arrives on site.
Building codes for residential dwellings are materially different from those governing standard sheds. Residential codes require floors to handle higher live loads, roof systems to meet local wind and snow ratings, and walls to use 2×4 or 2×6 framing rather than the lighter sections common in agricultural or storage sheds. This distinction matters because it directly limits which internal walls you can remove, where you can position openings, and how much weight a proposed loft can carry. Understanding the difference between a Class 1A and a Class 10A structure is foundational. Shed-homes has a clear explanation of Class 1A vs Class 10A requirements that is worth reading before you finalise any layout.
Foundation type and utility routing also constrain your floor plan in ways that are easy to underestimate. A concrete slab with pre-set plumbing penetrations locks your bathroom and kitchen into specific zones. Changing those zones after the slab is poured is expensive. Decide on your utility layout before you finalise the floor plan, not after.
- Confirm zoning classification and permitted use in writing from your council
- Obtain maximum footprint, height, and setback limits before designing
- Verify that your proposed framing meets residential live load requirements
- Map utility entry points and drainage runs before fixing wet area positions
- Secure all permits and approvals in writing to prevent costly redesigns
Pro Tip: Ask your council specifically whether your site is subject to ADU (Accessory Dwelling Unit) or secondary dwelling regulations, as these often impose additional floor area caps that a standard zoning check will not reveal.
How do you approach customising the layout, doors, windows, and internal zones?
The most functional shed home layouts are built around deliberate zones rather than open, undifferentiated space. Small shed layouts work best when divided into clear zones with maximised vertical storage, keeping the floor area usable and movement paths unobstructed. Define your living, sleeping, cooking, and storage zones on paper before you touch any design tool. This discipline prevents the common error of allocating too much floor space to circulation and too little to habitable rooms.

Digital tools accelerate the process considerably. Customisation workflows typically allow you to select style, size, doors, and windows with real-time repositioning on 2D and 3D previews, so you can test multiple configurations without committing to a build. Tools like the MySheds 3D Builder and home design software group options by style, size, openings, colours, interior fit-out, and framing, letting you move doors and windows freely to find the best fit. Use these tools to test natural light paths before finalising window positions. A north-facing living area in an Australian climate is not a preference; it is a thermal performance decision.
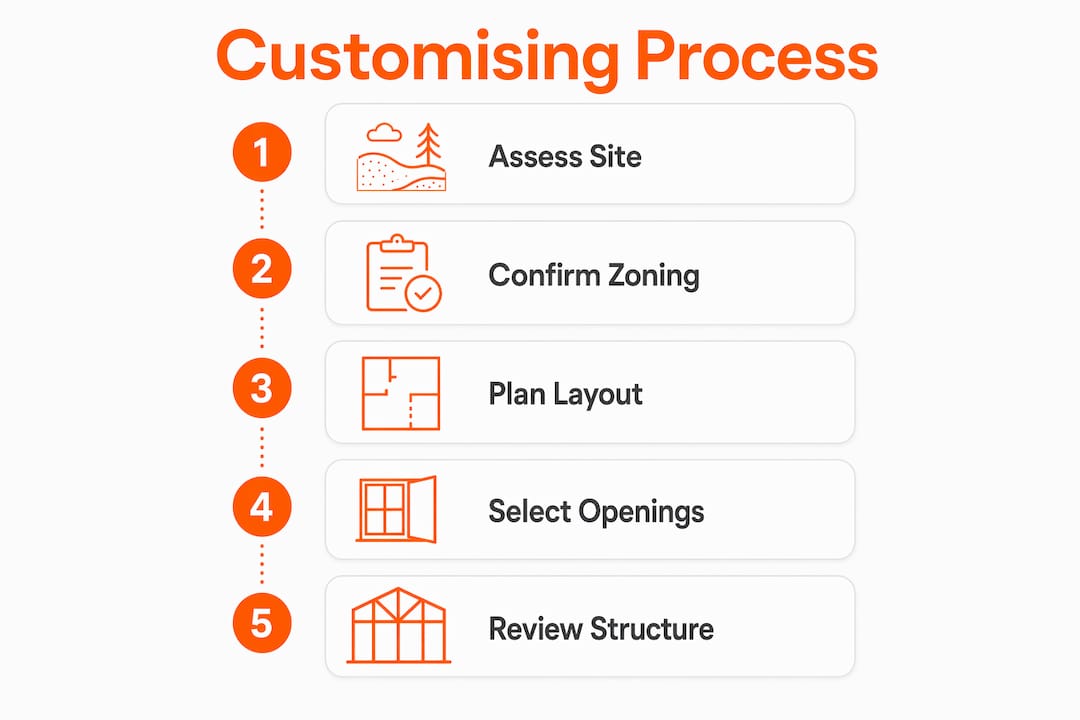
Follow this sequence when working through your layout:
- Fix your wet areas (bathroom, laundry, kitchen) first, as these are constrained by drainage and plumbing runs
- Position the main entry door to create a clear, direct path to the living zone without cutting through sleeping areas
- Place windows on the north and east elevations to capture morning and winter sun, and use eaves or pergolas to manage summer heat gain
- Assign vertical storage zones (floor-to-ceiling shelving, overhead cabinets) along walls that do not carry natural light
- Review the circulation path between every room to confirm no zone requires passing through another to reach a third
Pro Tip: Treat your floor plan as a series of movement decisions, not just room shapes. Walk through the plan mentally at 6am, midday, and 10pm to test whether the layout serves real daily behaviour.
What advanced layout customisations should you consider?
Lofts: headroom, access, and ventilation
Lofted designs introduce significant complexity that many DIY builders underestimate. Lofted designs must account for minimum headroom of 4 to 5 feet at the peak, a suitable access method, adequate ventilation, and natural light to be both comfortable and code-compliant. A loft accessed only by a fixed ladder is acceptable for storage but fails residential habitability standards in most Australian councils. Stairs for daily use are recommended over ladders, with attention to load ratings and ventilation. The stair footprint typically consumes 3 to 4 square metres of ground-floor space, so account for this before committing to a loft design.
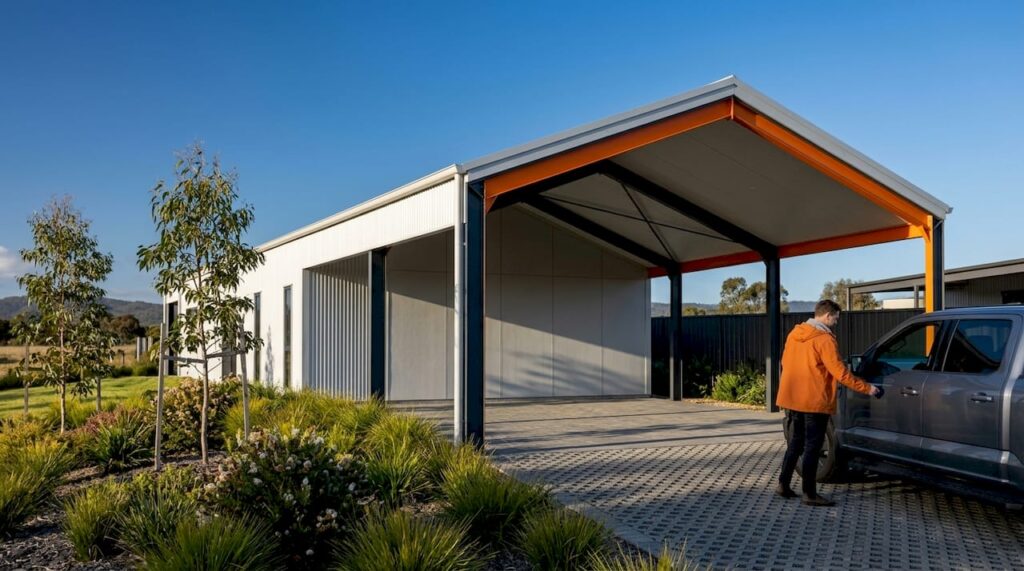
Porches and covered outdoor areas
A covered porch extending 2.4 to 3.6 metres from the main structure adds usable living area at a fraction of the cost of enclosed floor space. In Australian conditions, a porch on the north or east elevation functions as an outdoor room for nine months of the year. Loft or porch additions may require additional permitting and integrated planning with utilities, so confirm this with your council before including either in your design.
Structural framing and insulation
| Feature | Standard shed framing | Residential requirement |
|---|---|---|
| Wall framing | Light gauge steel or 90mm timber | 2×4 or 2×6 timber, or engineered steel equivalent |
| Floor load rating | 0.25 kPa (storage) | 1.5 kPa minimum (habitable rooms) |
| Roof load | Wind category only | Wind, live load, and ceiling load combined |
| Insulation | Optional | Mandatory; NatHERS rating required |
| Window headers | Minimal or absent | Structural headers required at all openings |
Proper air sealing around penetrations is critical for insulation performance and energy efficiency. Your floor plan must account for all utility and service chases to maintain the thermal envelope. A gap around a pipe penetration that takes ten minutes to seal during construction can cost hundreds of dollars annually in heating and cooling losses.
What common mistakes occur during floor plan customisation and how do you avoid them?
The single most damaging misconception in shed home design is that layout changes are cosmetic. DIYers often underestimate the impact of repositioning walls, windows, or doors on structural integrity, and this misunderstanding leads to failed inspections and expensive remediation. Moving a window by one metre may require a new structural header, a change to the wall stud spacing, and a revised engineering certificate. None of that is cosmetic.
“Layout changes can force structural upgrades beyond cosmetic edits due to load and framing code requirements.”, Shed to House Conversion: Legal & Cost Guide
The following mistakes appear repeatedly in shed home projects and are entirely avoidable:
- Skipping written zoning confirmation. Verbal council advice is not binding. Zoning and permitting fundamentally limit what floor plan changes are feasible, and clear written confirmation is non-negotiable before you invest in design work.
- Ignoring framing implications of opening changes. Moving openings affects framing headers and must be structurally supported. Always involve a structural engineer when repositioning doors or windows in a load-bearing wall.
- Underestimating insulation and ventilation requirements. A floor plan that looks efficient on paper can perform poorly thermally if service penetrations are not sealed and ventilation paths are not designed in from the start.
- Designing loft space without testing usability. Planning loft space requires consideration of actual body movements and storage reach to avoid unusable dead space. Crouch down and physically test whether your proposed headroom is liveable before committing.
- Treating a 3D visualisation as a structural document. Design tools are for spatial planning, not engineering sign-off. Always have your finalised floor plan reviewed by a qualified building designer or engineer before lodging for approval.
Bottom lines
Customising a shed home floor plan delivers a functional, code-compliant dwelling only when structural requirements, zoning rules, and layout logic are addressed together from the outset.
| Point | Details |
|---|---|
| Zoning first, design second | Obtain written council confirmation of footprint, height, and setback limits before committing to any layout. |
| Structural framing is non-negotiable | Residential live load and framing requirements differ fundamentally from standard shed construction and must be met. |
| Zone deliberately, store vertically | Dividing space into clear functional zones and maximising vertical storage delivers more usable floor area than expanding the footprint. |
| Lofts and porches require early planning | Headroom, stair footprint, ventilation, and permitting for lofts and porches must be resolved at the design stage, not during construction. |
| Layout changes are structural changes | Repositioning doors, windows, or walls triggers framing and engineering obligations that require professional review. |
Why I believe most shed home projects fail before the first panel goes up
The projects I see struggle most are not the ones with the smallest budgets or the most ambitious designs. They are the ones where the owner spent three months perfecting the interior layout and three days on zoning and structural research. That imbalance is the real risk.
The cold, hard truth about customising a shed home floor plan is that the creative work, choosing room sizes, positioning windows for light, deciding where the kitchen bench faces, is genuinely enjoyable. The regulatory and structural work is not. But the structural work is what determines whether your floor plan is buildable, approvable, and liveable. A beautifully zoned interior that sits on a slab with the wrong drainage penetrations, or that requires a wall to be load-bearing where you planned an open-plan space, is not a floor plan. It is a problem.
My advice is to spend the first quarter of your planning time on zoning, code classification, and structural constraints. Use that information to define the hard limits of your design. Then, and only then, let your creativity work within those limits. The result is a floor plan that does not just look right on screen. It gets approved, it gets built, and it performs as a home for decades. That is the standard worth designing to.
, Shed
How Shed-homes supports your floor plan from concept to approval
Shed-homes designs and supplies Australian steel frame kits engineered specifically for Class 1A residential compliance, which means the structural framing, load ratings, and NatHERS insulation requirements are resolved before you receive your plans. Every kit includes detailed architectural specifications that support council approval, removing the guesswork from the permitting process. Designs like The Tweed and The Tasman demonstrate how purposeful zoning and vertical storage can be built into a single-level layout without sacrificing comfort or liveability. If you want to understand the full build process from design confirmation through to lock-up, Shed-homes provides a clear, step-by-step pathway with no hidden costs. Contact the team for a design consultation and a fixed-price quote.
FAQ
What does it mean to customise a shed home floor plan?
Customising a shed home floor plan means adjusting the size, room layout, door and window positions, and internal zones of a shed-based dwelling to suit your specific living needs and site conditions. The process must account for residential building codes, council zoning rules, and structural framing requirements.
Can I move doors and windows freely when designing my layout?
Door and window positions can be adjusted during the design phase, but moving openings affects framing headers and requires structural support at each opening. Any repositioning in a load-bearing wall must be reviewed by a structural engineer before construction.
Do I need council approval to customise a shed home floor plan?
Yes. Planning permission and zoning determine whether a shed can be used as a dwelling and what floor plan configurations are permissible. Always obtain written approval from your local council before finalising your design.
What is the minimum headroom required for a loft in a shed home?
Lofted designs must account for a minimum headroom of 4 to 5 feet at the peak to meet basic comfort and code standards. Stairs are recommended over ladders for any loft intended for regular daily use.
How do I maximise space in a small shed home floor plan?
Small shed layouts are most functional when divided into clear zones with maximised vertical storage, keeping floor area free for movement and living. Fixing wet areas first and positioning storage along non-glazed walls are the two highest-impact decisions you can make early in the design process.
Recommended
- Shed Home Build Process | Approval Ready Kits
- Shed House Australia, Steel Frame Kits | Shed Homes
- Shed Kit Homes | Class 1A Shed Designs Australia
- The Tasman Shed Home Design | Shed Homes Australia
Ready to start planning your shed home?
Use our free 3D Shed Builder to design your layout, or send us an enquiry and we’ll get back to you with an obligation-free quote based on your site address.